

Technical
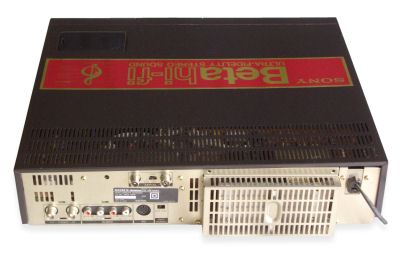 Rear view |
Fault and repair guideNo reel rotationA common fault with older machines is lack of reel torque. This can result in the machine shutting down in playback or record modes and the tape not being would back into the cassette housing after eject. The best cure for this is to replace the reel chassis. However, because of changes during production you may find that some other bits, such as springs, may need replacing as well. Sony also made available a 'motor mod kit' which consists of a .02mm thick piece of plastic which can be fitted in the worn bearing. Alternatively a small ball bearing can be fitted but this may require the rotor to be filed down to ensure the correct gap between rotor and stator coils.Audio level controls not operatingCheck that the audio monitor is set to Auto. The VU meters only show the Hi-Fi sound level in this mode.Deck goes into rewindThis can be caused by failure of the tape end sensor. You can check this by unplugging the sensor at its socket on the PCB. |
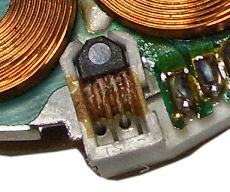 Hall effect sensor attached with glue |
No head drum rotationYou may find that the head drum fails to rotate. This is due to a problem with the Hall effect device on the head drum motor which is secured by a blob of glue. Full details on how to fix this can be found on the head motor page. |
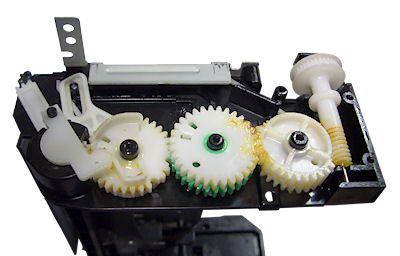
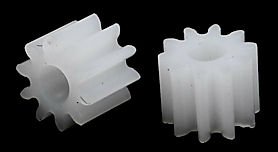
 Broken gear (left)
|
Failure to load a tapeThe cassette carriage can fail to operate. This is caused by breakage of the plastic gears in the side of the mechanism. Often one of the teeth is missing.When this happens the faulty gears must be replaced and the mechanism correctly realigned so that the left and right side "tray arms" are at the same position relative to the front panel. This is done by releasing the plastic tab on the gear away from the motor side and selecting the correct mesh position with the teeth of the drive cog on rod which connects between both sides of the cassette tray. This problem is also found on the SL-F30, SL-F60 and the SL-HF77. |
|
|
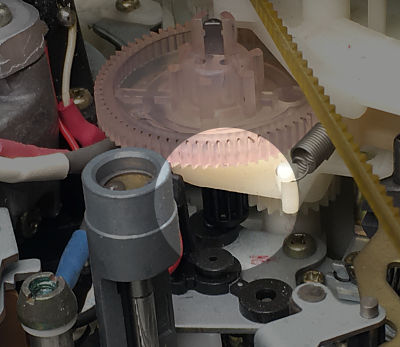
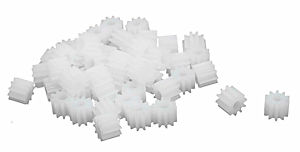
Loading gear and shaft repairThe loading shaft for the Sony has no official replacement but most times it can be repaired, unless the gear is in two pieces or a tooth has broken off. There are two approaches to solve this, either repair the broken gear, or purchase a similar gear and adapt it to fit.
In practice the diameter is sufficient and the reduced length does not really matter, just use super glue (or other suitable glue) to glue them to the shaft and protrude the shaft 1mm or so past the end.
See: RC-Toy-Car gears
If you don't need 50 then look for a smaller quantity but the price does not seem to change much. |
Quick fault guide
Please click on the button if you are able to contribute a solution to this list or would like to add to, or update PALsite's information on this model. Please note, questions will be removed.If you have a question about this model, please raise it on the chatpage.
| Fault | Solution |
|---|---|