
Technical
 SL-F60 rear view |
Power supply problemsThis VCR uses a STR1229A (IC001) at the heart of its power supply. If you experience PSU problems then this is the first thing to check. Be sure to check outputs 'onload' as the regulator can otherwise appear OK.Deck goes into rewindThis can be caused by failure of the tape end sensor. You can check this by unplugging the sensor at its socket on the PCB. |
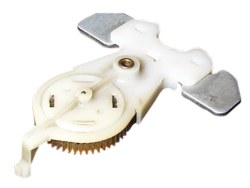 Pendulum |
Stops in play or recordThis is becoming a more common problem these days. The first thing to check is that there is adequate torque on the take up spool. If there isn't much then the cause is usually down to two contributing factors.The first is the drive pendulum which can cease up and the second more serious factor, is wear on the reel motor bottom bearing. The pendulum is simple to replace but the bearing is moulded into the chassis and replacement necessitates that the entire chassis be replaced. One possible compromise is to fit a small piece of plastic into the bottom bearing to raise the rotor and allow it to move freely. Sony supply a repair kit for this purpose. |
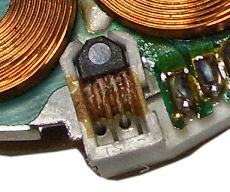 Hall effect sensor attached with glue |
No head rotationYou may find that the head drum fails to rotate. This is due to a problem with the Hall effect device on the head drum motor which is secured by a blob of glue. Full details on how to fix this can be found on the head motor page. |
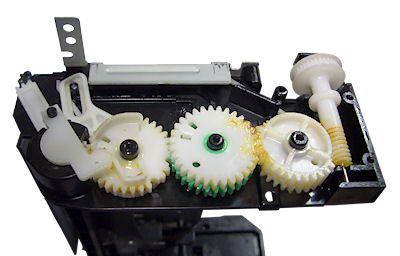
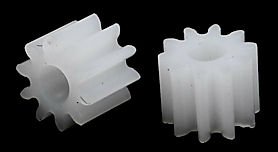
 Broken gear (left)
|
Failure to load a tapeThe cassette carriage can fail to operate. This is caused by breakage of the plastic gears in the side of the mechanism. Often one of the teeth is missing.When this happens the faulty gears must be replaced and the mechanism correctly realigned so that the left and right side "tray arms" are at the same position relative to the front panel. This is done by releasing the plastic tab on the gear away from the motor side and selecting the correct mesh position with the teeth of the drive cog on rod which connects between both sides of the cassette tray. This problem is also found on the SL-F30, SL-HF150 and the SL-HF77. Loading gear and shaft repairThe loading shaft for the Sony has no official replacement but most times it can be repaired, unless the gear is in two pieces or a tooth has broken off. There are two approaches to solve this, either repair the broken gear, or purchase a similar gear and adapt it to fit.
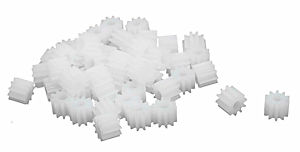
In practice the diameter is sufficient and the reduced length does not really matter, just use super glue (or other suitable glue) to glue them to the shaft and protrude the shaft 1mm or so past the end.
See: RC-Toy-Car gears
If you don't need 50 then look for a smaller quantity but the price does not seem to change much. This machine is nearly identical to the SL-F30 and many of the tips listed will be relevant. |
[an error occurred while processing this directive]