

Technical
 Inside
|
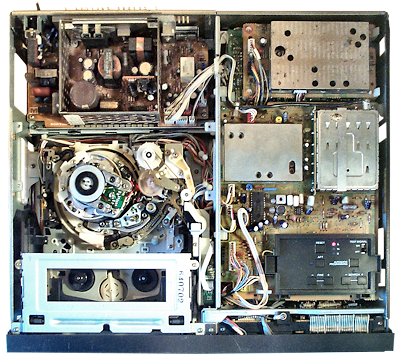
Fault and repair guideNote, the inside image also shows the power supply can in the top left hand corner with the top removed.No reel rotation.A common fault with older machines is lack of reel torque. This can result in the machine shutting down in playback or record modes and the tape not being would back into the cassette housing after eject. The best cure for this is to replace the reel chassis. However, because of changes during production you may find that some other bits, such as springs, may need replacing as well. Sony also made available a 'motor mod kit' which consists of a .02mm thick piece of plastic which can be fitted in the worn bearing. Alternatively a small ball bearing can be fitted but this may require the rotor to be filed down to ensure the correct gap between rotor and stator coils.
Audio level controls not operating.Check that the audio monitor is set to Auto. The VU meters only show the Hi-Fi sound level in this mode.
Failure of VU meters.The audio level meters can fail in some segments. Failure is not usually due to defective LEDs but faulty drive ICs. Because of the way this unit is constructed it is not possible to repair and the whole unit should be replaced.
|
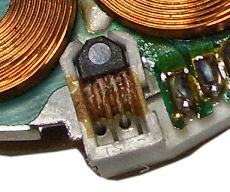 Hall effect sensor attached with glue |
No head drum rotationYou may find that the head drum fails to rotate. This is due to a problem with the Hall effect device on the head drum motor which is secured by a blob of glue. Full details on how to fix this can be found on the head motor page.
No tape transportThe forward torque pot (third board down at the back near the TV O/P can) gets dry/contaminated changing value which causes tape crease and jamming. CRC spray and a mechanical action back and forth when resetting tension can restore the machine to original performance. If you don't have a torque meter then the rule of thumb for adjusting this is to play the tape and back off the torque until tape just slacks slightly and then turn pot on about 15 degrees. Then confirm tape is not too slack after fwd review/preview actions while searching the tape for a particular scene.Thanks to Noel Higgins for this tip. Deck goes into rewindThis can be caused by failure of the tape end sensor. You can check this by unplugging the sensor at its socket on the PCB. |
|
|
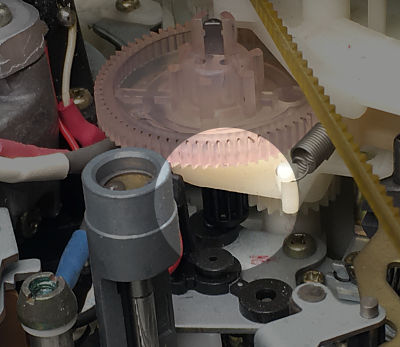
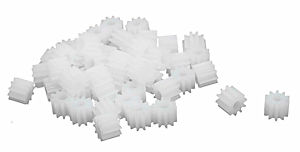
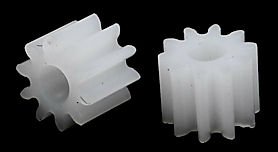
Loading gear and shaft repairThe loading shaft for the Sony has no official replacement but most times it can be repaired, unless the gear is in two pieces or a tooth has broken off. There are two approaches to solve this, either repair the broken gear, or purchase a similar gear and adapt it to fit.
In practice the diameter is sufficient and the reduced length does not really matter, just use super glue (or other suitable glue) to glue them to the shaft and protrude the shaft 1mm or so past the end.
See: RC-Toy-Car gears
If you don't need 50 then look for a smaller quantity but the price does not seem to change much. |
Quick fault guide
Please click on the button if you are able to contribute a solution to this list or would like to add to, or update PALsite's information on this model. Please note, questions will be removed.If you have a question about this model, please raise it on the chatpage.
| Fault | Solution |
|---|---|
| B/w picture / picture interference | Clean tape path & check setting of tape guide number 5 |
| Dead | Check transistors Q622, Q623 [2SC24581] & 0627 [25D882P] then check regulator chip IC1 (MB37593) |
| Insufficient tracking range in playback | Check transistors Q102 [2SKI52] & 0107 [2SK152] for failure |
| No drum or capstan operation | Check resistor R652 [1k ohms] on the M panel for open circuit |
| No functions | Check resistors R607 & R608, transistors Q601 [2SC24581, Q602 [DTC144ES] then check T601 on panel M |
| No operation and -au- on display at switch on | Check transistor 0627 for dry joints / failure |
| No picture / interference on picture, sound distorted | Check resistor R039 [10ohms] on panel RP17 |
| No picture in e-e mode, sound ok | Check capacitor C111 between pins 11 a 12 of 1C9 for failure |
| No stereo | Check IC003 ITDA3800AS for failure |
| Not switching to AV mode via the AV input | Check resistor R040 a transistor Q66 [2SA1175] on panel YC28 |
| Poor playback pictures, heads or | Check 1C301 [CXI94B-5] an panel SS28 for failure |
| Sticking on 1 channel | Check crystal oscillator CF101 on the TU60 panel |
| Tape transport erratic | Suspect failure of the pinch arm assembly. |
| machine suddenly dies | Change on/off switch |
| No video or sound AV O/P, Drum motor runs too fast. Machine stops in FFWD & REW | Check solid state fuse PS001 (N20) in 9V supply on bottom Board YC-28 and replace if necessary. |
| Drops out when trying to rewind or reverse search | The metal edge which lifts the tape flap when it is loaded can become bent and short out the tape sensor coil where the wires solder on. Check that it is not touching and if it is straighten the bracket base and position it so as to avoid contact. The coil should read about 3.9 ohms when working correctly. |
| Machine plays but picture blanks after about a second. Preview or Review work | Video mutes because of lack of tracking pulse. In this case (probably rare) Q307 on the SS-28 servo board had become leaky and was self biasing causing the tracking amplifier bias to shut it off.
Replace the Q307 transistor. (marked 603) |
| No colour or no Chroma in playback mode | Bad CV001 in Video Board. Replace. |
| VU meter repair | The chips very seldom give issues and replacing the LEDs will bring the VU display back to life. I will do a video showing how to do this on the HF100 and HF950 machines but instructions and details are here: https://drive.google.com/file/d/1ZEvjDZrdYN1X7qjPpWB2HgYpY6UxaWbq/view?usp=sharing Unfortunately the website has long since disappeared. MrBetaByte |
| Level meter segments not illuminating | I cleaned the level meter sliders and level meter switch, seemed to solve it. |